This article walks you through the complete experience of taking a CAT-style quiz on Graphy- from the instruction screens to submitting your answers. Some features you see during the test depend on how your course admin has configured the quiz, so if something looks different from what is described here, check with your admin.
Step 1: Starting the Quiz
Go to My Courses from your learner dashboard and click on the relevant course card.
Inside the course, find the quiz in the course curriculum. It appears as a chapter item.
Click on the quiz chapter item and then click Start Quiz.

Step 2: General Instructions
Once you click Start Quiz, you will first see the General Instructions screen. Read through these carefully before proceeding. Once you have read the instructions, click Next to proceed.

Step 3: Specific Instructions
Note: This screen appears only if your course admin has set specific instructions for the quiz. If no specific instructions have been configured, you will be taken directly to the quiz after the General Instructions screen. The Specific Instructions screen covers subject-wise details such as:
- The three sections of the quiz — Section I: VARC, Section II: DILR, Section III: QA
- Marking scheme:
- MCQ: +3 for a correct answer, -1 for a wrong answer, 0 for unattempted
- Non-MCQ: +3 for a correct answer, 0 for a wrong answer or unattempted (no negative marking)
Check the box next to "I agree to the above Terms & Conditions for this examination" and click I am ready to begin.

Step 4: The Test Window
Once you begin the test, you will see the full quiz interface. Here is what each part of the screen does:
Section Tabs (top bar)
For a sectional quiz like CAT, you will see tabs for each section — VARC, DILR, and QA — at the top of the screen. The active section is highlighted. You need to complete all the questions within a section before moving to the next.
Note: Your admin may set a minimum time you must spend in a section before you are allowed to move forward. If you try to switch sections too early, the system will prevent it. This is an admin-configured setting — if you are unsure why you cannot move ahead, contact your admin.
Timer
The countdown timer at the top right shows the time remaining for the current section. When it reaches zero, the section is automatically submitted and locked. You cannot go back and edit a section once it is submitted or locked.
Question Navigation Panel (right side)
On the right side of the screen, you will see an open numbered grid showing all questions in the current section. Each number is colour-coded to reflect the status of that question:
- Green: Answered
- Red/Orange: Not Answered (you visited the question but did not answer)
- Grey: Not Visited (you have not opened this question yet)
- Purple: Marked for Review
- Purple with icon: Answered and Marked for Review — this will still be evaluated
You can click on any question number in the panel to jump directly to that question.
Marks and Negative Marking Indicator
Just above each question, you will see the marks awarded for a correct answer and the negative marks for a wrong answer. Check these before answering, especially for MCQ questions.
[Image placeholder: Marks for correct answer and Negative marks indicator above a question]
Bottom Action Buttons
At the bottom of each question, you have the following options:
- Save & Next: Save your current answer and move to the next question.
- Mark for Review & Next: Flag the question for later review and move to the next question. If you have already answered it, the answer will still be evaluated.
- Clear Response: Remove your selected answer for the current question.
- Submit: Submit the current section (or the entire quiz for the last section).
Step 5: Group Questions
For questions that are linked to a common passage or data set (such as Reading Comprehension in VARC or sets in DILR), the screen splits into two parts:
- Left side: The passage, table, or data set
- Right side: The individual question with answer options
All other controls — navigation panel, timer, bottom buttons will appear the same.

Depending on how your admin has set up the quiz, you may or may not see the following tools in the test window:
1. Calculator- A calculator icon appears at the top of the test window. If your admin has enabled it, you can use it during the test. If you do not see the calculator, it has not been turned on for your quiz- contact your admin if you believe it should be available.
2. Question Paper
Clicking Question Paper at the top right opens a downloadable or viewable version of the full question paper for reference during the test.
3. Instructions
Clicking Instruction at the top right lets you re-read the instructions at any point during the test without leaving the quiz.
4. Report an Error
This is a setting configured by your admin. It can be turned off too if this is a distraction during exam taking.
Step 7: Submitting a Section
When you click Submit during a section, a Submit Quiz popup appears showing a summary of your attempt for that section:
- Answered
- Not Answered
- Not Visited
- Marked for Review
- Answered and Marked for Review (will be evaluated)
The popup also shows the remaining time.
Note: If time is still remaining before the 40-minute mark, a message will inform you that submissions open at the 40-minute mark and ask you to use the remaining time to review your answers. You will not be able to submit the section until the minimum time has passed. Once you are ready, click Submit in the popup to lock in your responses for that section and move to the next.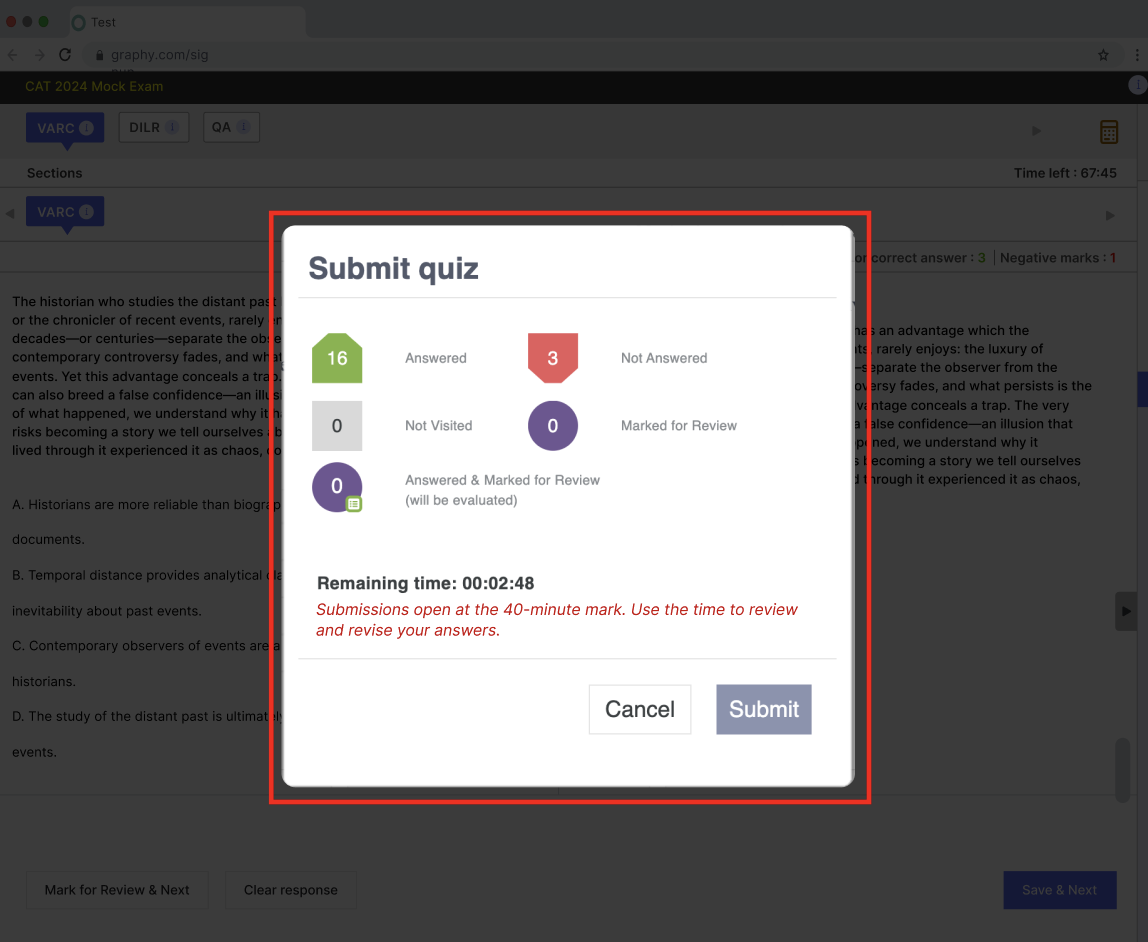
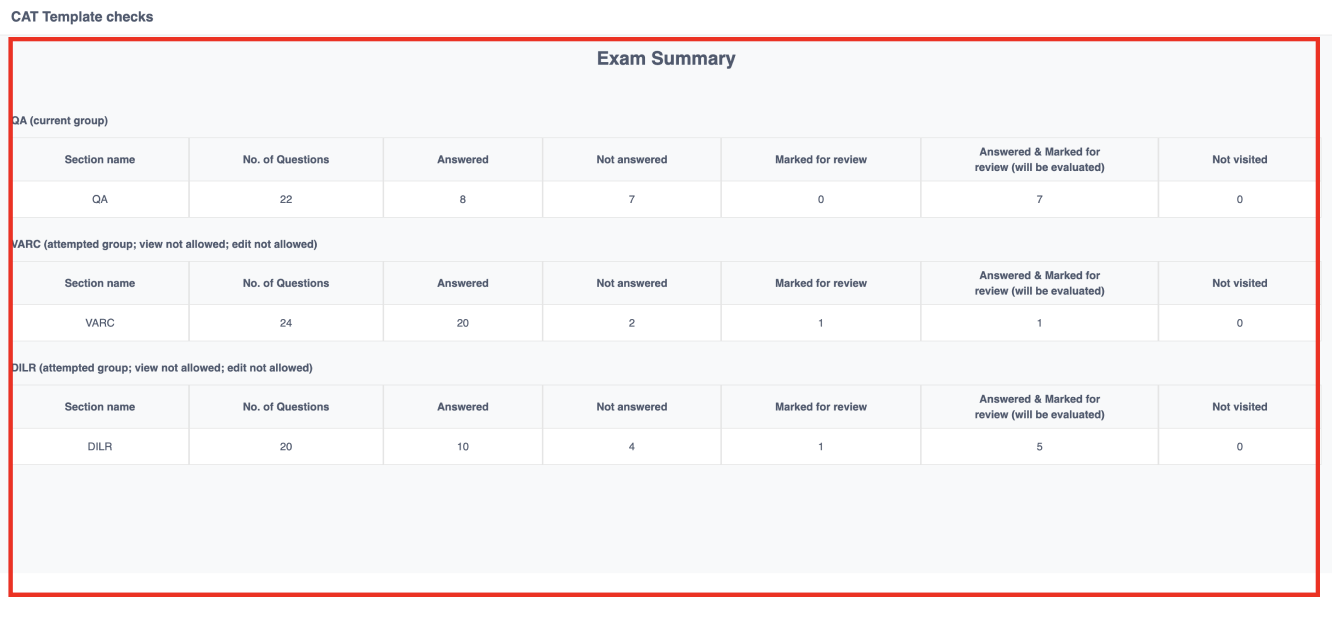
Step 8: Exam Summary
After all three sections are completed (or the overall timer expires), an Exam Summary screen appears. This shows a section-by-section breakdown of:
- Number of questions
- Answered
- Not Answered
- Marked for Review
- Answered and Marked for Review
- Not Visited
Note: For some quiz configurations, the admin may choose not to show the Exam Summary after each individual section, but display it together at the very end after all sections are done. This is an admin-configured setting. If the time limit expires before you manually submit, you will see the message: "Your quiz has been submitted automatically as the time limit has expired." Click Close to exit.
Step 9: Disqualification on switching tabs
Switching tabs will cause user to drop off from the chat

Was this article helpful?
That’s Great!
Thank you for your feedback
Sorry! We couldn't be helpful
Thank you for your feedback
Feedback sent
We appreciate your effort and will try to fix the article