This guide provides a step-by-step process for creating and launching a large-scale webinar.
Start by navigating to the desired course for adding the live class.

Step 1: Add the live class to a chapter.

Step 2: Choose the "large screen webinar" option.

Step 3: Fill in the title and availability details.

Step 4: Click on "Submit" to create the large scale webinar class. The recording starts automatically when the class begins. To provide the recording to the learners, toggle the option to "yes".
Step 5: Save the changes and to start the class, click on "launch". It may take a few seconds for the stream to start.
Setting Up the Stream
Once the server is set up, follow these steps to start streaming:
Step 1: Copy and add the provided keys to your streamers. For this guide, OBS is used.

Step 2: Navigate to "settings" on the OBS screen.

Step 3: Go to "stream" and ensure that the "Service" section is selected as "Custom" and finally add the keys. If keys are already added, update them.

Step 4: Click on "okay" and then "start streaming".

Going Live
Step 1: Return to the main screen and Wait for the preview to load.

Step 2: Select the "Go live" option. The stream becomes visible to learners only after selecting "Go live".
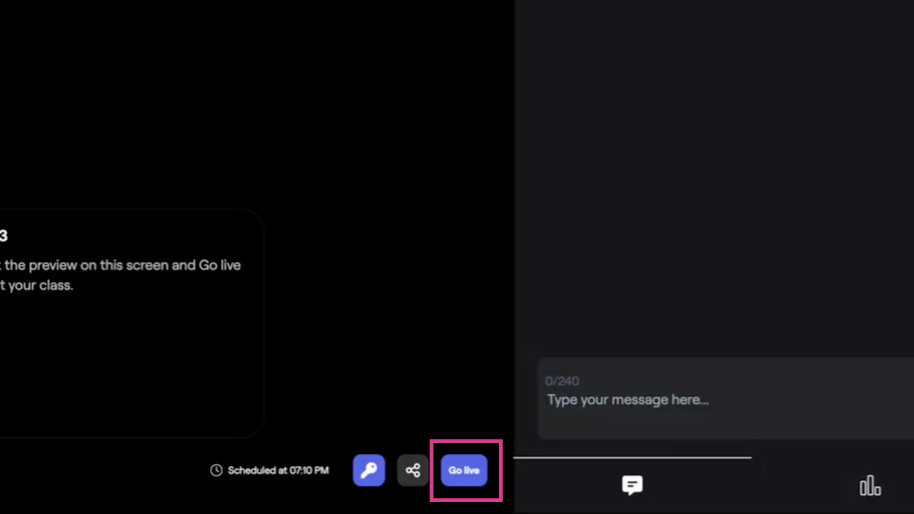

Once live, a blinking indicator shows that the recording is in progress.

Was this article helpful?
That’s Great!
Thank you for your feedback
Sorry! We couldn't be helpful
Thank you for your feedback
Feedback sent
We appreciate your effort and will try to fix the article